

Step 1 – Open Settings App
From the home screen on your iPad or iPhone running iOS 13 or higher select the settings App as shown in the image below.

iPad Settings App icon shown on home screen
Step 2 – Select Display & Brightness option
After opening Settings you can scroll down on the left hand menu and select the Display & Brightness setting, as shown in the image below.
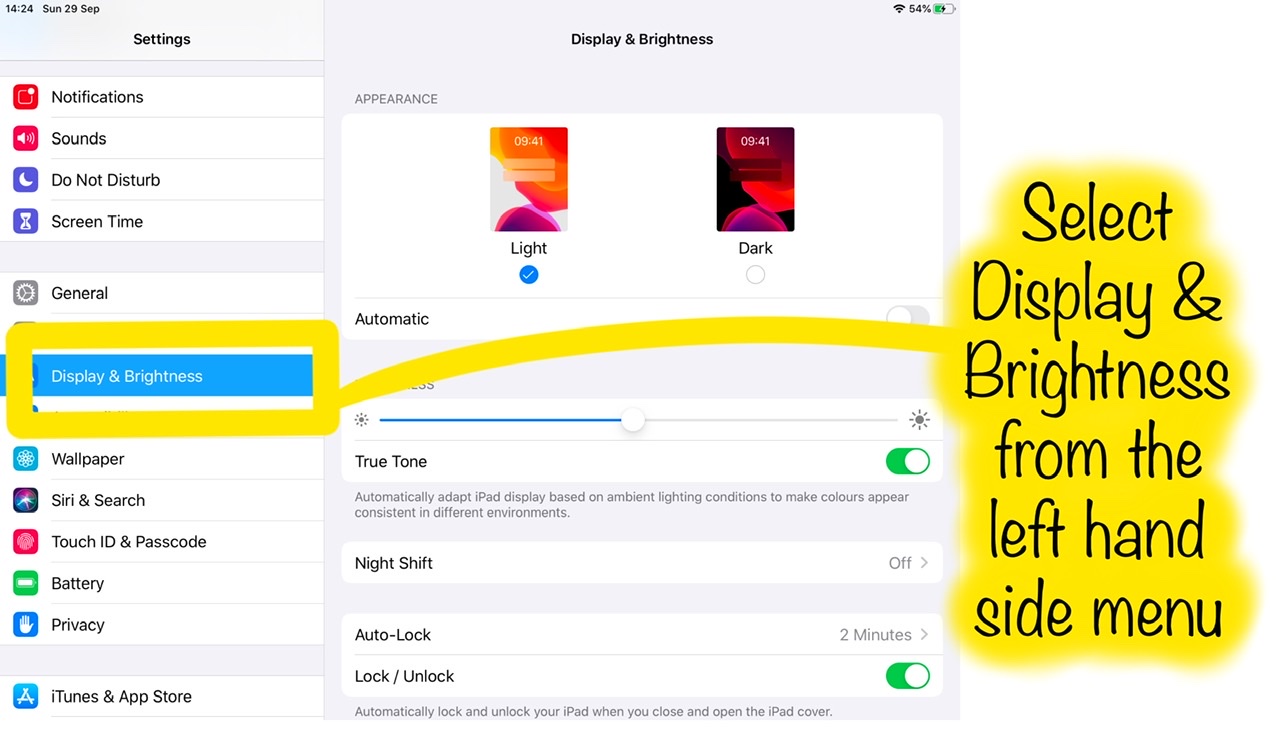
Display & Brightness option in iPad menu
Step 3 – Select Dark Mode
After selecting Display & Brightness you will see the option for dark mode on the right hand side near the top. To simply turn on dark mode continuously you can select this option, shown in the example below.

Enable Dark Mode shown in iPad settings
If you would like to schedule Dark Mode then select the Automatic option shown in the example below. By default this is set to enable Dark Mode at sunset but it can be custom scheduled, read on for more information.

Enable Dark Mode automatic schedule
If you would like to set a custom schedule you can select that under the Options setting and pick a start and finish time of your choice instead if the default Sunset option. See image below.

Enable Dark Mode custom schedule
Step 4 – See how Dark Mode looks
Once you have selected the Dark Mode options, return to the home screen and see how Apps look with the darker theme.

Email App in Dark Mode on iPad

News App shown in dark mode on iPad
if you have any questions about this guide then please don’t hesitate to get in touch, we are always happy to help.


